How To Create A WordPress Blog Using Namecheap | Best 101 guide
Are you planning on starting a WordPress blog using NameCheap?
I know everyone wants to create their blogs or websites on WordPress but most are not able because of how some hosts are expensive. You need not worry about this because, in this tutorial, I’m going to share with you a step-by-step guide on how you can create a WordPress blog using NameCheap.
NameCheap is one of the World Cheapest Web hosting with great features, I believe you already have a Namecheap account before searching for this guide, if not, click HERE to get your account at a discount rate.
The dream of everyone is to start blogging and start making a good amount of money at the end of the day.
However, for you to start making that good sum of money, you will need to firstly create a blog using affordable and great web hosting that will never let your site down.
Thats why I’m recommending Namecheap in this tutorial. In the process of planning on how you start to create a WordPress blog using Namecheap, some of these like questions must have gone through your mind;
- Can you create a blog with NameCheap?
- Can I Use WordPress on NameCheap?
- Does NameCheap Have softaculous?
- How do I connect my Namecheap domain to WordPress?
In this tutorial, I’m going to try my best to answer all these questions so you can start your WordPress blog using Namecheap without facing further errors. Make sure to get your NameCheap account before proceeding or you can probably bookmark this post for further reference.
Now, let us begin!
14 simple steps to start a blog on WordPress Using NameCheap Hosting: Required steps.
- Pick a niche.
- Brainstorm your branding name.
- Get your domain and Hosting ( Get up to 94% off this month on NameCheap).
- Login into your cPanel.
- Access your softaculous App installer.
- Install WordPress with one click.
- Clean and set up your WordPress dashboard.
- Pick a simple, attractive, clean and fast loading theme.
- Change your WordPress installation folder.
- Change your WordPress permalinks.
- Publish your recommended pages ( About Us, contact us and Privacy Policy)
- Write your first blog post.
- Share it and get traffic to the site.
- Plan on Monetization strategy.
What is a niche?
A niche is the topic of interest your website is concentrated on and sharing content about to your audience.
Some of the best few niches for the past 2-3 years are; HEALTH, TECH, WEALTH, RELATIONSHIP and PASSION.
NOTE: is not a must for you to choose from the ones listed above. You can choose absolutely any niche you are passionate about. is very important for you to love what you do and do what you love. But make sure whatever niche you choose should be profitable.
Must read: 10 most profitable blog niches to start in 2022
You may ask why should I care about a niche when it’s all about creating or starting a WordPress on NameCheap?
The reason is simple.
When choosing a domain or blog name, You don’t want to buy a domain name only to realize that you can’t make use of it because is not related to your niche.
I’m usually saying this from my experience before I finally stick to PERES TECH, I bought different domain names in the past that are not in any way related to my content making it difficult for me to explain my niche to the best of satisfaction to my audience.
I shipped in this paragraph because I don’t want you to go through the same process, so if you are confused about the domain name to choose, you can simply use your name if your name is long you can abbreviate it.
Most people thought this blog is all about technology when they hear the name PERES TECH. The Peres in the domain name is simply my name. PERES=PEREKABOWEI and the TECH= TECHNIQUES. You see how it’s easy to choose a domain name?
There are lots of bloggers who usually use their name as the domain such as, Neilpatel.com, Anastasiablogger.com and many more.
How to buy a domain and hosting on Namecheap?
Before you move to this stage, you probably have your domain name in mind and the topic/niche you want to blog about.
Now, is time to get the domain and hosting from NameCheap.
So here is how to buy a domain and hosting from NameCheap.
Click here to go to the NameCheap home page and choose your hosting plan at an affordable rate.
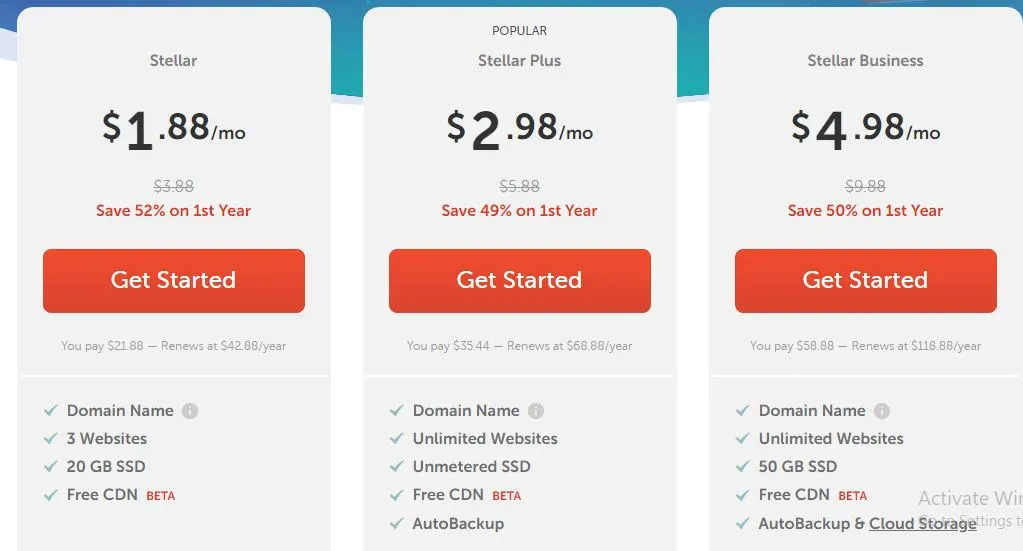
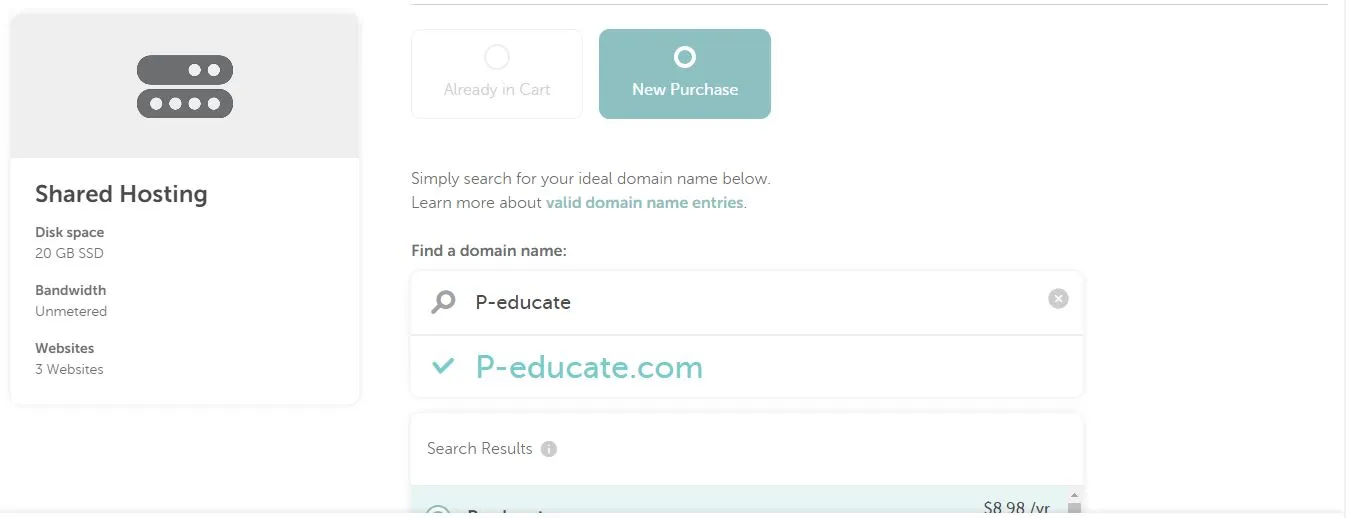
Choose the package that suits your budget and click on GET STARTED button and you will be taken to a page where you can search and add your chosen domain name to your order cart. Make use you use my link and get a discount of up to 50% off the shared hosting plan.
If you are financially tight, you can simply go for the stellar plan since it is just $21.88 this plan is also the same as the stellar plus. Even if you don’t have the complete cash, you can simply partner with a friend and both of you can share that plan since you are allowed to host up to 3 websites on it. Anyways just choose any of the plans and get started.
NOTE: For the Datacenter Location, choose the location of your choice depending yon your targeted audience location. It’s set to US datacenter by default. However, the rest datacenter’s are not free you will be charged $12 but that of US is 100% free so you can simply go with that if your budget can’t afford the rest.
The next step is for you to choose where your domain name is located, you can either use a domain you already have in your cart or simply go for a new domain.
In our case, we don’t have a domain so simply click on New domain, after that screw down a bit and you will see where you will be required to type in your domain name with a search icon. Just type in your domain name and click on enter, the system will now detect if the domain name is available, “.COM” will be selected for you by default.
After that, just click on ADD TO CART and proceed to the next step.
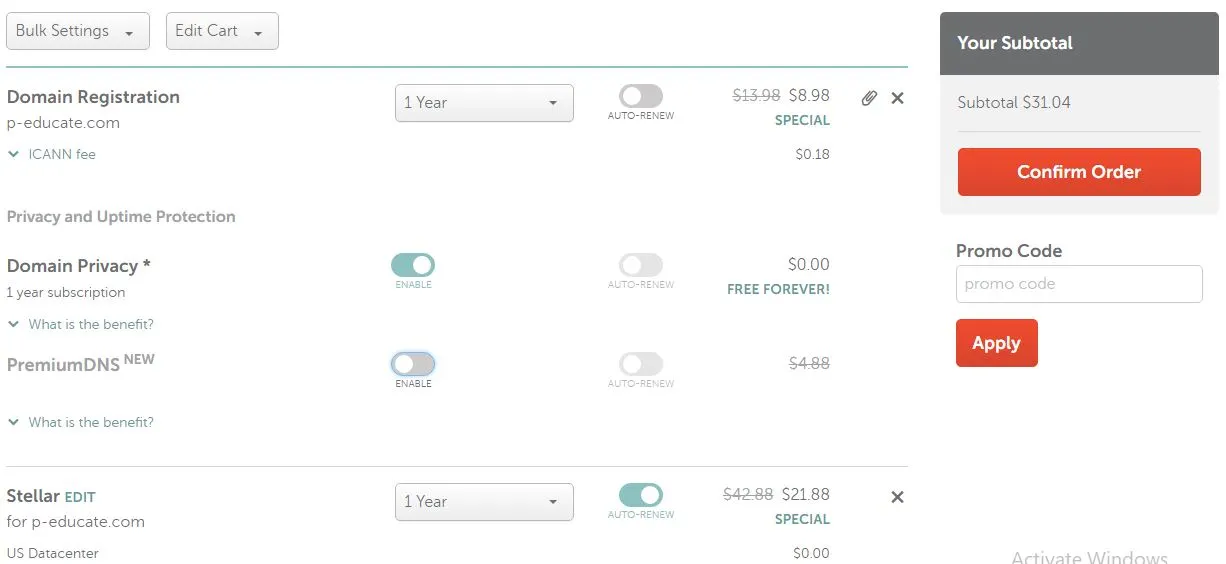
Before you click on to confirm the order, make sure your chosen domain and hosting are available and everything looks right then CONFIRM YOUR ORDER. The Domain Privacy is free forever so make sure to enable it.
After you’ve confirmed your order, you will be required to login into your account or create a new account, since you currently don’t have an account so you will have to create an account to be able to proceed with your order to the checkout page.
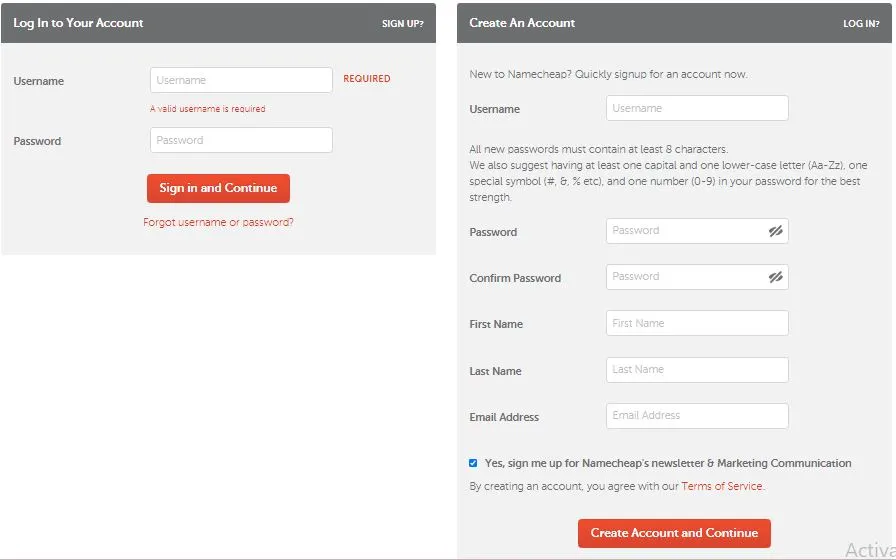
Fill in your required details and go on to your checkout page.
Once you’ve made your payment and completed all the required on-screen prompts, You will receive an email from Namecheap containing your cPanel login details.
Where you can start your WordPress setup and installation process. If your domain is hosted on a different registrar, you can simply update its nameservers to point to that NameCheap’s
Here are Namecheap name servers; dns1.namecheaphosting.com, dns2.namecheaphosting.com. nameserver updates may take a few minutes or hours to update so kindly be patient for at least 30 mins.
Once you confirm that everything is great to this stage, it is time to log in to cPanel and get things done.
There are two ways to access your cPanel, one is through your Namecheap dashboard and the other is by using your domain name.
To sign in through your Namecheap dashboard is relatively straight forward so let’s move to the next step where we have to sign in using your domain name. This can be done by simply adding /Cpanel at the end of your domain.
e.g
You will be directed to your cPanel sign-in page, from where you will be required to enter the credentials sent to you through email when you bought the hosting.
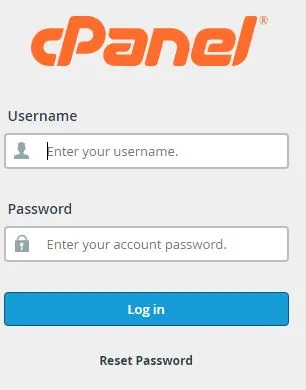
Any way you use it, you will land on this same page.
Before you install WordPress is important for you to first install an SSL certificate., but there is no problem since I want you to spend less we will have to firstly install WordPress then I will show you a free plugin that will give you a free SSL certificate.
However, if you want a premium one, you can get one from Namecheap by clicking HERE to get a positive SSL certificate at just $3.88 only for a year.
How to install WordPress on Namecheap cPanel?
Once you sign in into your CPanel, screw-down
and click on the “Softaculous Apps Installer” located right under the Exclusive For Namecheap Customers section.

This will bring you to a page where you will choose your preferred script to be installed since we are using WordPress just select WordPress.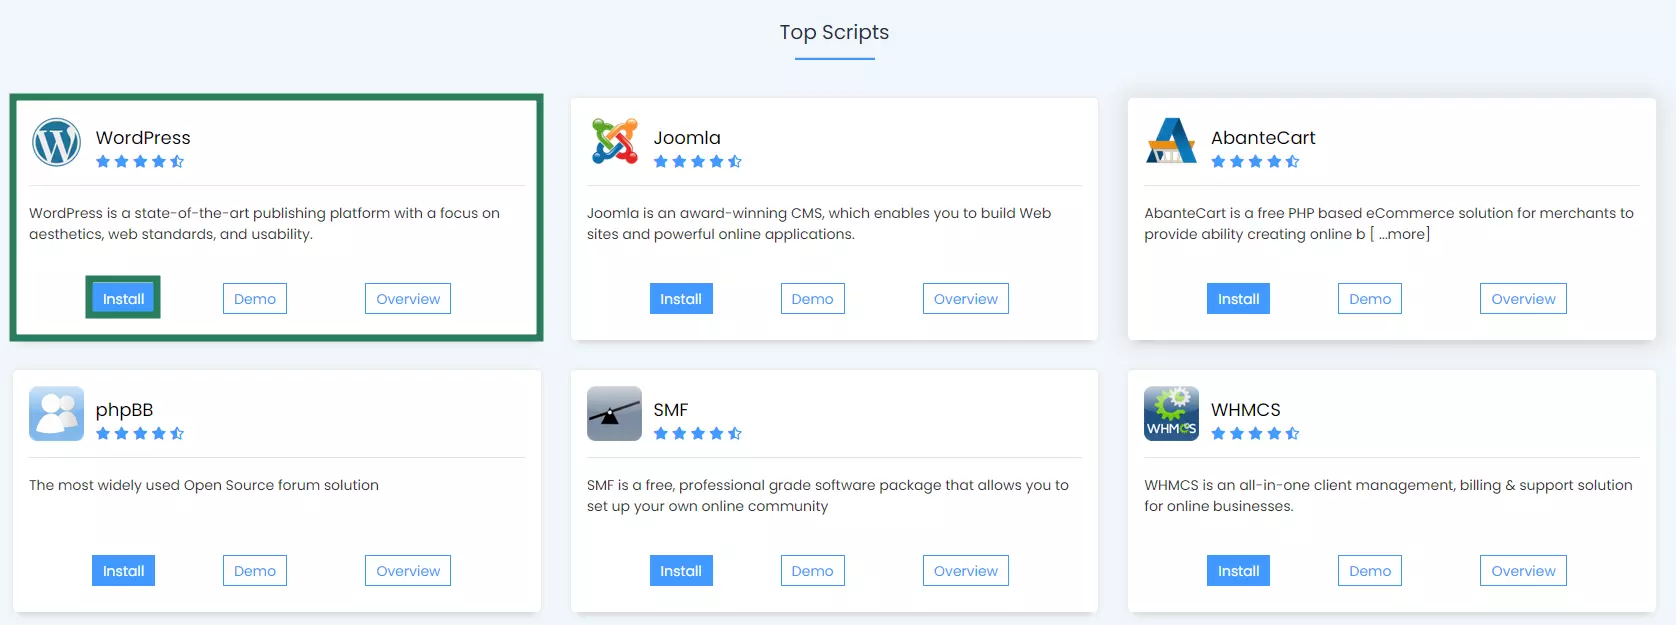
You can simply go by this or probably use the alternative method, that you can perform directly from your cPanel home page. All you need to do is locate the section that says “Softaculous Apps Installer” and click on WordPress.
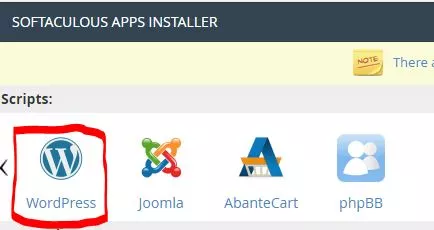
Any way you take will land you on the WordPress installation page with multiple options.
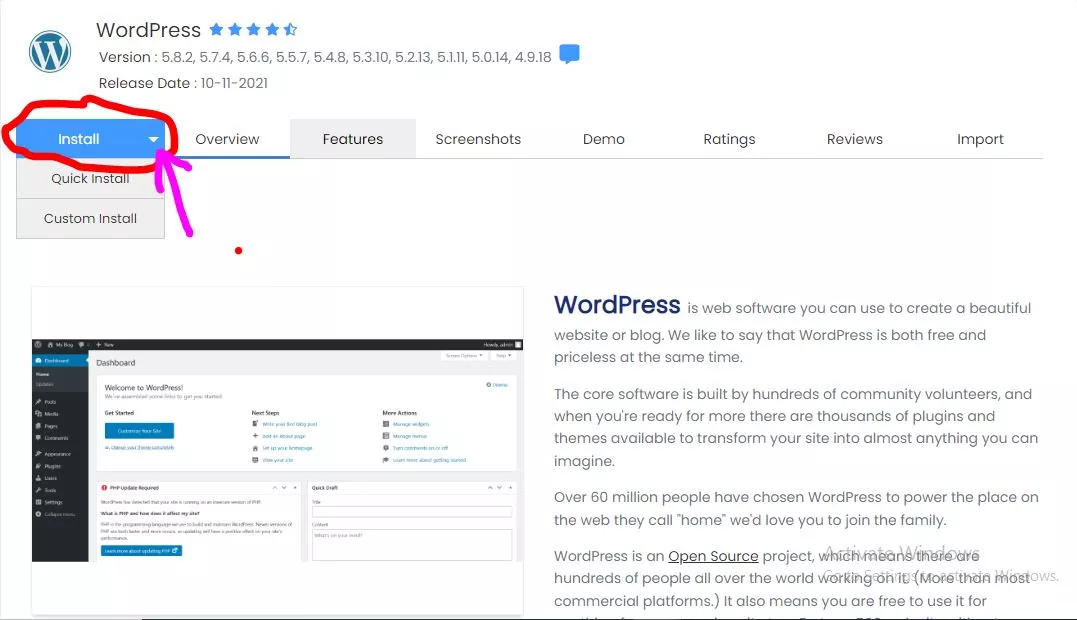
Click on the drop-down icon to select your installation type, I recommend you go by the custom installation so you can set it to your satisfaction. When you go by the quick installation, it will be automatically installed to your primary domain so I recommend you go by the custom installation so you choose the domain you want to install WordPress on.
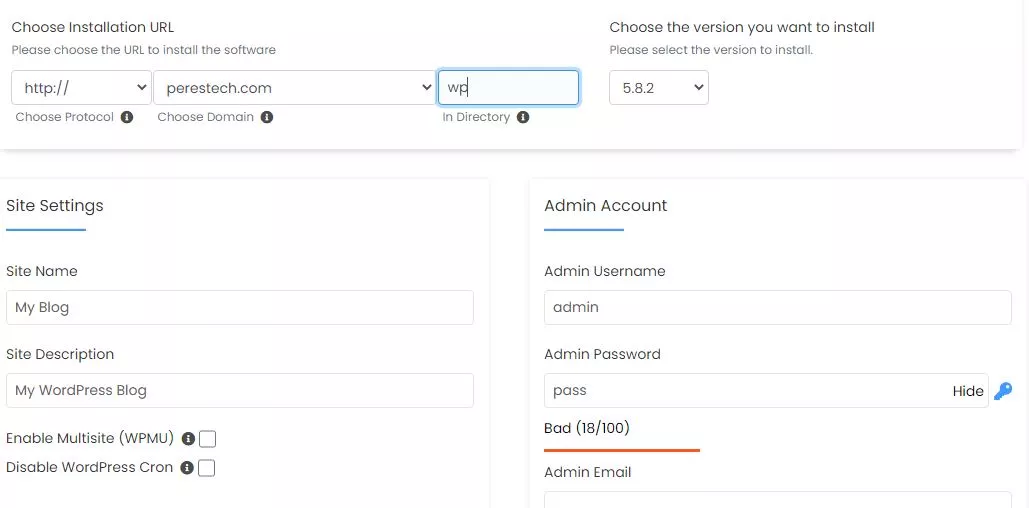
Here you will be required to enter some important details such as Your Site Name, Site Description, Admin Username, Admin Password and Admin Email. there are a few steps I’m going to take you through below.
1. WordPress software setup.
When it comes to choosing the WordPress version, you should install, the most recent version (Current Version).
There are two options for the Protocol type which are https://www and https://, I advise you to go with the https://.
Your installation Directory will be (WP) by default, make sure to clean it and leave it empty.
2. WordPress Site Settings.
Here, you simply need to do two things which are inputting your preferred Site Name and Site Description also known as your Site Tagline.
3. Admin (Administration) Account.
Here you will have to insert your Username and Strong Password. make sure you use a password you can easily recall because it will be required whenever you want to login into your WordPress account.
Recommended: Save your password and username down.
You can use the default email which is admin@yourdomainname.com or simply edit it as I did.
4. Picking Theme.
WordPress will offer you a dummy theme by default. There are two ways in which you can change your theme, one is by installing it directly from your WordPress installation page or by installing it on your WordPress dashboard. Anyways you use it, all the same.
.
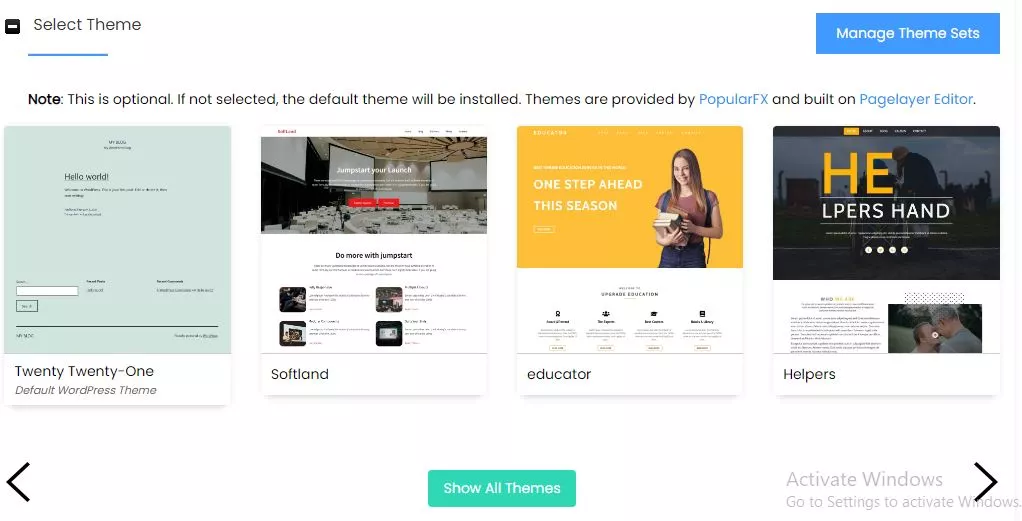
Just scheme through the theme options using the navigators provided to make sure you choose a good looking theme for yourself.
Once all this is done, now is time for us to sign in to our WordPress account using our Username and the Password we provided above.
How to login to your WordPress dashboard
There are two ways in which you can sign in to your WordPress dashboard. One is by using the URL provided by Namecheap or simply heading over to your browser and using yourdomainname/wp-admin/. This will open up a page that looks like the one below.
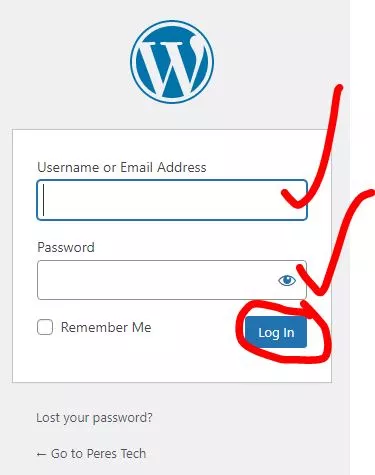
Now enter the Username and Password you provided during the installation process and click on the sign-in button to login into your account.
Once you sign in, your homepage will look like the one below with some default posts which you will have to delete before proceeding. Navigate to the POST menu and click on ALL POST
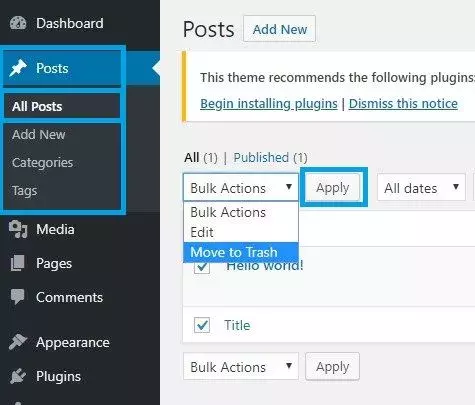
Now, select the Hello World! post checkbox, then click on the Bulk Actions and select the Move To Trash option from the drop-down menu and then click on the Apply button to move the demo post to trash. Also, move to the PAGE menu and open ALL PAGES and follow the same steps applied on the posting page to trash the demo pages as well.
Once you’ve completed all the steps above, now is time to make the necessary settings for your HOMEPAGE and make your blog or website appear on Search Engines.
Here are the things to look into before proceeding.
- General Settings –Here, make sure you set everything as you want it and also confirm your Site Title, Tagline, URLs, Language, Timezone, Date and Time formats, First day of the week, once all is confirmed just click on Save Changes.
- Reading – For your site to be available on Search Engines, make sure to uncheck the Discourage Search Engine from indexing this Site after then just Save Changes. However, if your site is still under construction kindly leave it checked but make sure to uncheck it once you are done.
- Discussion – Here you will be given options on how to manage your comments. I recommend you check Comments must be manually approved, so you can avoid spammy comments.
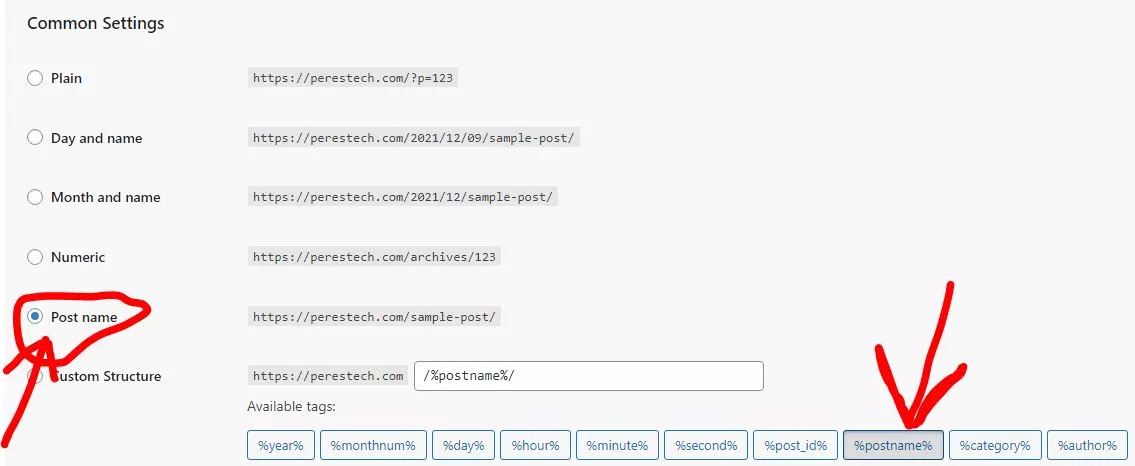
- Permalinks – Here is where you decide on how you want your Post URLs Structure to look. I recommend you go by the Post Name for the sake of SEO benefits as shown below and click Save Changes.
How to install free SSLs on WordPress
The procedures we are going to use when installing the free SSLs, are the same procedures you will apply when installing plugins on WordPress.
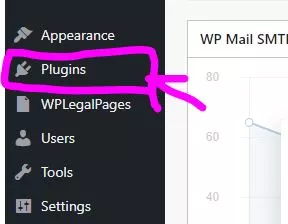
Now, go back to your WordPress dashboard and locate the Plugins menu and click on Add New.
When you hover your mouse (PC users) or click (Phone users) on the plugins, you will see multiple options where you have to select Add New. Once you click on it, it would direct you to the following page.
Once you are here, navigate to the Search Plugin area and search for “SSL Insecure Content Fixer” there will be a lot of options, make sure to choose the one highlighted below.

I have already installed it on my website that’s why it’s showing active. For you, you will see an “Install Now” button just click on it to install. Once installed, head over to your WordPress side menu and click on Plugins.

Once you see the plugin, kindly click on “Enable auto-update. After that click on “Settings” right under the plugin name. Screw down until you see “Capture” Make sure to check it.

Next- Screw-down till you see “Standard WordPress Function” and make sure to check it as well, after that just click on “Save Changes”.
CONGRATULATIONS, YOUR WORDPRESS BLOG HAS BEEN SUCCESSFULLY CREATED AND HOSTED ON NAMECHEAP.
What next?
Monetization, your main aim of starting a blog is to make money from it right? but before we talk about making money off it, let also consider getting a decent amount of traffics. Pinterest and Quora are the best places to drive traffic to your blog.
When it comes to monetization, there are two most popular ways which are Affiliate marketing and Selling of Ads space.
As a beginner affiliate marketing is one of the best ways to make money off blogging. 8 Best Affiliate Programs For Bloggers.
If you find this tutorial post interesting, consider sharing it with your friends, family and social media handles.😍
If you have any questions or a particular topic you want me to talk about, drop them in the comment below. I will try my best to answer all.😍
This post contains affiliate links.


4 Comments